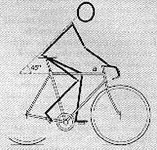
With the right crank in the 5 o'clock position (approximately in line with the seat tube of the frame) raise the saddle until the heel of your foot just reaches the pedal (without rocking your hip towards that side). Now check the left side. You may notice that one side seems shorter than the other. That's perfectly normal because everyone is asymmetrical in one way or another. Generally we size to the shorter limb so as to avoid over extending a joint.
 Place your feet in the proper position on the pedals and begin pedalling at a moderate cadence with moderate resistance. Ideally the saddle should be as high as possible without overextending the joint.
The easiest way to establish the correct height is to raise the saddle until it is too high, then lower it slightly. When you are close, a difference of only a couple of millimetres can be felt, so raise and then lower the saddle in very small increments.
What's too high?
You will be watching or feeling for two symptoms:
a) Smoothness of the stroke - When the saddle is too high your hips will start to rock slightly side to side trying to compensate for the added length, or you may start pedalling with your toe down more than normal.
b) You will feel the flesh (all the internal stuff) in the back of your knee start to tighten.
Either of these indicates that the saddle is slightly too high, so then you can lower the saddle a few millimetres at a time until these symptoms disappear. From the side view, your knee should have a slight amount of flexure in the lowest position of the pedal stroke. At this point in the sizing procedure, don't go neurotic trying to get the saddle height perfect, because you may need to change it again after the next step, saddle fore and aft location.
A Serotta Size-Cycle and appropriately trained technician is available in the form of James Huggins, of Rock 'n' Road Cycles. If you like what you hear in this section please with your details and we will be happy to pass them on to James. James also imports the complete range of Serotta bikes from the USA so again if you are interested in further details and we'll do the necessary.
